Bulding an Email Agent using N8N
Goal
I wanted to create a workflow that automatically creates a calendar event to remind me to pay my bills. This was also an exercise for me to learn n8n, a workflow automation tool I’ve been wanting to explore after seeing so many people online using it. I thought I’d start “simple” by making this app.
I’m writing this in hindsight and I’ve realized setting up “Autopay” is a far better way to pay bills than creating a system where I ultimately have to pay the bill manually anyway. Basically, I’m automating the wrong part of the process. :D I guess this could still be useful for bills that don’t support autopay.
Stack
- n8n: Workflow automation tool
- Render: Hosting service
- OpenRouter: LLM aggregator service (provides a uniform interface for many LLM models)
- Microsoft Azure: App registration so n8n can access my Outlook
- GitHub: For development
Self-hosting n8n using Render
I used a hosting service called Render and followed this guide. Render lets you specify a YAML file, called a “Blueprint,” to deploy your entire app in just minutes. The blueprint template I used can be found here.
Creating a Microsoft Azure Account
A Microsoft Azure account was needed to access their Microsoft Graph API, which lets us send, receive, and create calendar events associated with an Outlook account. This step was necessary because I wanted n8n to connect directly to Outlook.
Here are the steps I followed (this serves as a reference for me too):
- Navigate to Azure Portal.
- Search for
App Registrationin the main search bar. - Click on
+ New Registration. - Give the registration a name (I just went with
n8n-outlook-integrationor something similar). - For “Supported account types,” I selected “Personal Microsoft Account Only” since this workflow is just for my personal Outlook account.
- Enter the redirect URL generated by the n8n Outlook node (e.g.,
https://n8n.yourdomain.com/rest/oauth2-credential/callback). - On the app’s main page, click on “Certificates & secrets” and create a new client secret.
- Click on “API permissions” and grant the app
Mail.Readpermission. - Provide n8n’s Outlook node with the client secret and client ID (the client ID can be found by clicking on
Overview).
I think I could have used plain IMAP/SMTP for email access to avoid all this setup, but doing it this way offered more features and flexibility.
Result
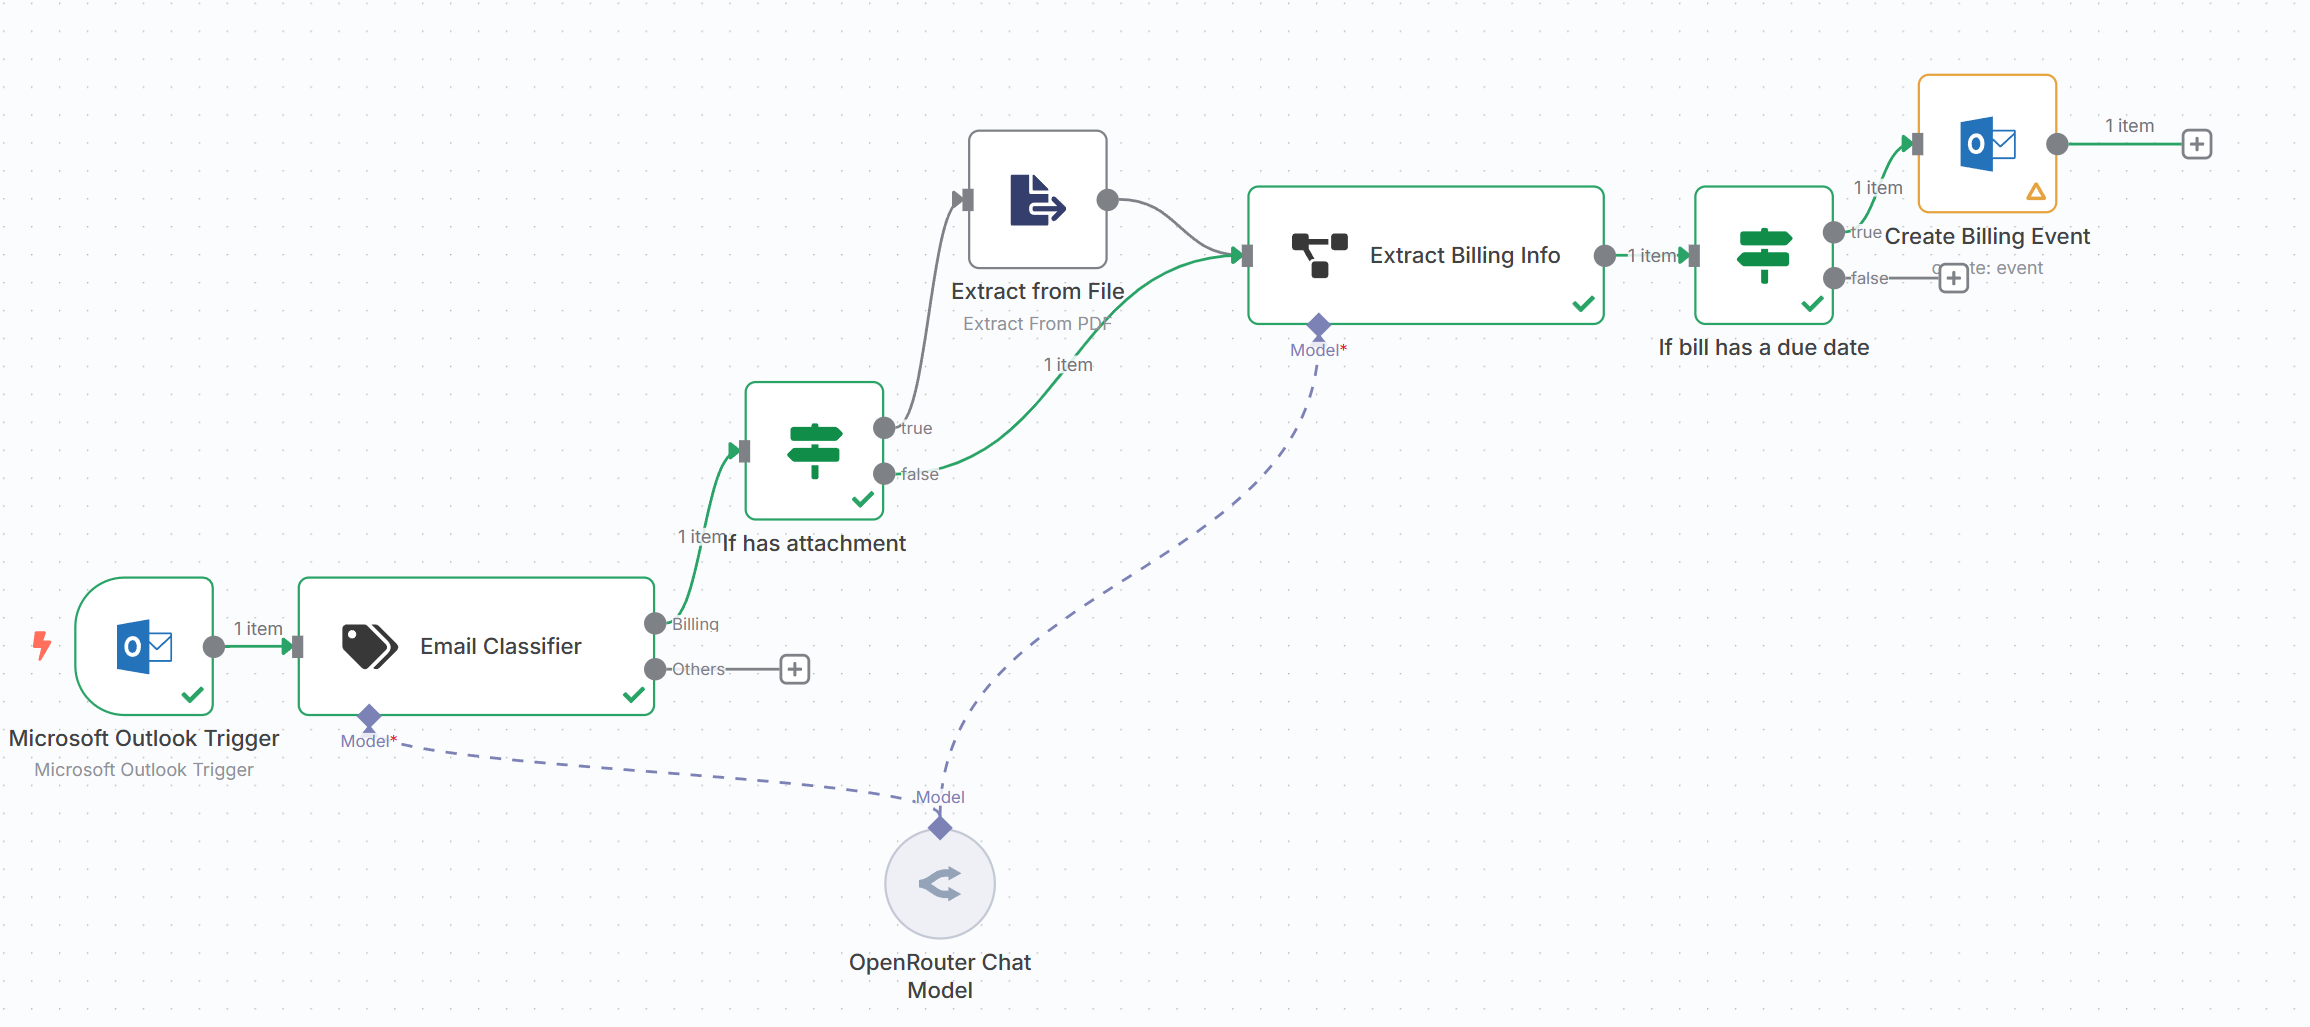
Here’s a screenshot of the workflow:
Once executed, it creates an event in my calendar with the description and amount owed as the title of the event. The event’s description contain a link to the orignal email of the bill.
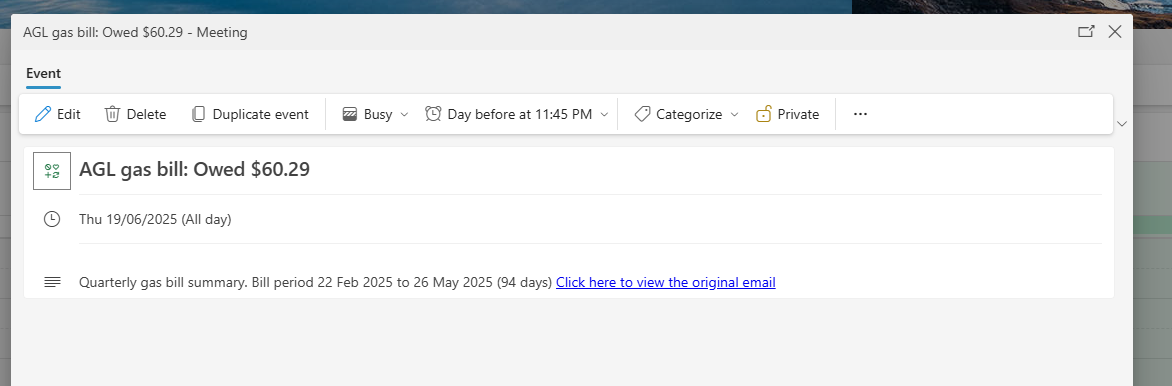
My gas bill isn’t usually that high lol, it just because i forgot to pay the last one.
You can download the n8n template here:
Download Email Agent JSON
The workflow consists of the following nodes:
- Microsoft Outlook Trigger: Triggers the workflow whenever I get an email sent to my “bills” folder.
- Email Classifier: An
LLM-powered node that scans the email to determine if it’s a bill. - If has attachment: Conditional logic that checks if the email has an attachment.
- Extract from file: Extracts content from the attached PDF.
- Extract Billing Info: Uses an
LLMto extract information relevant to the bill, such as the due date, description, and BPAY (if available). - If has a due date: Conditional node that checks if the bill has a due date. (I added this because some bills don’t have a due date, or we’re not required to pay them.)
- Create Billing Event: Creates a calendar event to remind me to pay the bill.
Conclusion
Overall, I really like n8n. In the past, I’ve typically cooked up a Python script to handle these kinds of tasks, but n8n’s visual, programmatic style, features, and large community really make this tool shine for me. I’ll definitely use it again for future automation projects.